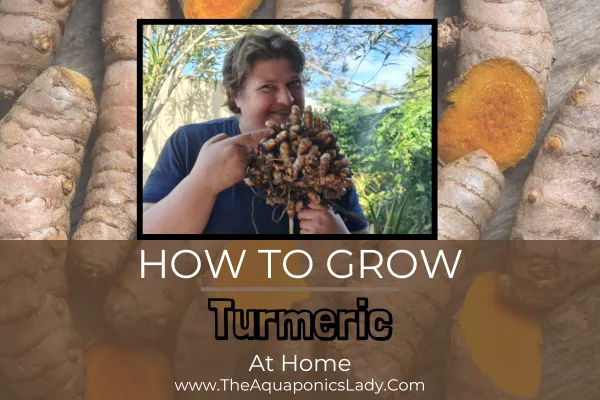
How to Grow Turmeric at Home: A Simple Guide for Beginners

Growing Turmeric at Home: Beginner Tips for Planting & Care
Turmeric is one of those "plant it and forget it" crops that rewards you with a golden harvest after months of quiet growth. If you’ve ever wanted to grow fresh turmeric at home, the good news is—it’s surprisingly simple. With the right setup, you’ll enjoy a homegrown supply of this vibrant, health-boosting spice year after year.
Why Grow Turmeric at Home? Benefits of Homegrown Turmeric
Turmeric is famous for its bold colour, earthy flavour, and powerful health benefits. While you can buy it in stores, nothing compares to the fresh, homegrown variety. Store-bought turmeric is often dried and ground, which reduces its potency. But when you grow your own, you can enjoy the freshest turmeric possible, use the leaves in cooking, and even share your harvest with friends.
Plus, it’s surprisingly simple to grow! Unlike some fussy plants, turmeric thrives with minimal attention—just give it the right conditions, and it will do the rest.
Ready to start planting turmeric? Grab a fresh rhizome and follow these steps!

Turmeric Growing Conditions: What You Need to Get Started
Turmeric grows best in warm, tropical conditions between 20-30°C (68-86°F) and needs about nine months to fully mature. This means if you plant it in early spring (September for me in Australia), you can expect to harvest by June the following year. If you live in a cooler climate, don’t worry—you can grow turmeric in pots and bring them indoors when temperatures drop.
Choosing the Right Soil and Location
Since turmeric is a root crop, it needs loose, well-draining soil that allows the rhizomes to spread easily. If your soil is too compacted or heavy with clay, the roots will struggle to develop. Mixing in compost or organic matter will improve the texture and provide the nutrients turmeric needs.
Turmeric thrives in full sun, so pick a sunny spot in your garden or place your pots where they’ll get at least six hours of sunlight a day. If you’re planting in a garden bed, give each plant around 40cm (16 inches) of space to allow the roots to spread properly.
Want to get your Eyes and Hands on the FREE Online Aquaponics Essentials Course?
This is a great free resource to really understand how aquaponics is a sustainable ecosystem that will grow your organic food is a productive way.
You learn how all the 'parts' make up the 'whole', and helps to give you the foundations of understanding aquaponics.
Sign up HERE
Planting Turmeric: Best Way to Grow Turmeric at Home
Turmeric grows from rhizomes (similar to ginger), not seeds. When choosing rhizomes to plant, look for pieces that have small nodules or "buds" on them—this is where the new stalks will sprout from.
To plant:
Cut larger rhizomes into smaller sections, making sure each piece has at least one bud.
Plant them 5-7cm (2-3 inches) deep in the soil, with the buds facing upward.
Water well and keep the soil moist but not soggy.
Within a few weeks, you’ll see green shoots emerging, and over time, the plants will grow over 1 meter (3 feet) tall with lush, tropical-looking leaves.
Turmeric Plant Care: Watering, Feeding & Maintenance Tips
Turmeric plant care is minimal once it’s in the ground. Once planted, turmeric doesn’t need much maintenance. Here’s what you should keep in mind:
Watering: Turmeric enjoys consistent moisture, but it doesn’t like to sit in soggy soil. If you’re growing in a container, make sure it has good drainage.
Feeding: Adding organic compost or a balanced fertilizer at planting time helps boost growth.
Mulching: A layer of mulch will help retain moisture and keep the roots cool in hot weather.
Pests & Diseases: Turmeric is generally pest-resistant, though slugs and snails may nibble on young leaves. Hand-picking them off or using organic deterrents will keep them at bay.
Turmeric Harvest: When and How to Harvest Homegrown Turmeric
While you won’t see what’s happening underground, your turmeric rhizomes will be quietly expanding. After about five months, you can dig around the edges and harvest small pieces, but for a full harvest, wait the full nine months. When it’s time for your turmeric harvest, look for signs like yellowing and dying back, signalling that it’s time to dig up your turmeric.
To harvest:
Carefully loosen the soil around the plant using a trowel.
Gently pull up the entire plant.
Shake off excess soil and rinse the rhizomes clean.
One of the best things about turmeric is that it stores incredibly well. You can keep fresh rhizomes in the fridge for weeks or freeze them whole to use as needed.
Check out my great video on how to grow turmeric:
Can You Grow Turmeric in Pots & Tips for Container Gardening
Absolutely! If space is limited, turmeric grows well in containers. The key is to use a large pot (at least 20L or 5 gallons) to give the rhizomes enough room to spread. Place your pot in a warm, sunny spot, and keep the soil consistently moist.
Turmeric also does well in wicking beds, which provide steady moisture without overwatering. I personally grow mine in a wicking bed instead of aquaponics because it takes nine months to mature. Since I use my aquaponics system for faster-growing crops, I let turmeric do its thing in the wicking bed, where it thrives.
Using Fresh Turmeric: Ideas After Your Harvest
Once harvested, there are endless ways to use fresh turmeric:
Grate it into curries, soups, and stir-fries for a warm, earthy flavour.
Blend it into smoothies for a nutritional boost.
Make turmeric tea by slicing fresh rhizomes and steeping them in hot water.
Use the leaves to wrap fish or chicken for cooking—they add a mild, aromatic flavour.
Check out my video on what to do with turmeric:
Ready to Start Growing Turmeric at Home?
Growing turmeric at home is easier than most people think and an incredibly rewarding experience. It requires little effort but provides a bountiful harvest of fresh, aromatic rhizomes. Whether you plant it in your garden or in a pot on your balcony, turmeric is a low-maintenance crop that will return year after year.
Why not give it a go? With just one small rhizome, you could be harvesting your own turmeric in less than a year!
Learn More About Aquaponics
Check out the COURSES page to learn how you can get started with aquaponics now. Click HERE.
Check out My YouTube Channel 'Candy The Aquaponics Lady'
Aquaponics is an ecosystem, and with anything it takes time to learn how it works. So, sit back and binge watch my 'how to' playlist and the 'Water Quality Made Simple' Playlist, and learn the next steps in your aquaponics system as you create the ecosystem.
Here are the next 2 videos I recommend you watching to create your ecosystem ~ before you add any fish
How Aquaponics Works as an Ecosystem
Why Aquaponics is the best, and most sustainable form of gardening in small spaces
Learn More About Aquaponics
Check out the COURSES page to learn how you can get started with aquaponics now. Click HERE.
Want to get your Eyes and Hands on the FREE Online Aquaponics Essentials Course?
This is a great free resource to really understand how aquaponics is a sustainable ecosystem that will grow your organic food is a productive way.
You learn how all the 'parts' make up the 'whole', and helps to give you the foundations of understanding aquaponics.
Sign up HERE
Want to help out and Feed my Fish?? (They don't drink coffee)

Candy Alexander is a dedicated aquaponics enthusiast with a wealth of formal training in aquaculture. Over the past 15 years, Candy has been deeply immersed in both commercial and backyard aquaponics, honing her skills and expertise in this sustainable farming method.
Candy's passion lies in making aquaponics accessible to everyone. With a mission to simplify aquaponics, she believes that anyone can embark on this sustainable journey.
She encourages those new to aquaponics to "kick the tires" without a significant financial investment. Her guidance focuses on helping people start their aquaponics journey with small-scale systems, ensuring a low barrier to entry for newcomers.
Candy shares practical tips, step-by-step guides, and personal stories to inspire and guide readers on their aquaponics adventure. Whether you're a seasoned farmer or a curious beginner, Candy Alexander is your go-to source for simplifying aquaponics and fostering a sustainable gardening experience.